Introduction to KEIL MDK, How to Install KEIL MDK Downloader
1. Introduction to KEIL MDK
The RealView MDK Development Kit is derived from the Keil Company in Germany and has been verified and used by more than 100,000 embedded development engineers worldwide. It is the latest ARM software development tool for various embedded processors. RealView MDK integrates the industry's most advanced technology and combines the features and functionality required by most Chinese software development engineers. The latest version includes μVision4 integrated development environment and RealView compiler, supports ARM7, ARM9 and the latest Cortex-M3 core processor, automatic configuration startup code, integrated Flash programming module, powerful Simulation device simulation, performance analysis and other functions, and ARM Compared to previous toolkits such as ADS, the latest version of the RealView compiler can improve performance by more than 20%. KEIL MDK adds support for the Cortex-M3 core, so we can use it for the development of ARM Cortex-M3-based STM32 microprocessor applications.
2. Install KEIL MDK software
Open the supporting CD - "software resources" - "development environment" - "KEIL MDK" folder under the installation file MDK400_mcu123.exe. Double-click to open, enter the welcome interface.
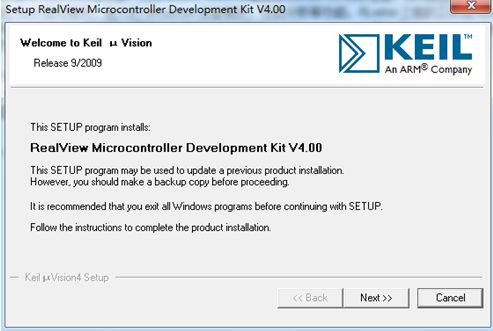
Click Next.

Check the installation agreement and click Next
Select the installation path. Here is the choice of F disk, if the reader hard disk resources, it is recommended to install in the C drive, run faster. Here is a point to note is: If you have previously installed keil c51 environment, install keil mdk can be installed in the same folder, so that KEIL V4.0 can support 51 chips. After selecting the installation path, click Continue.

Fill in the user information, individual users can simply fill in, click Next
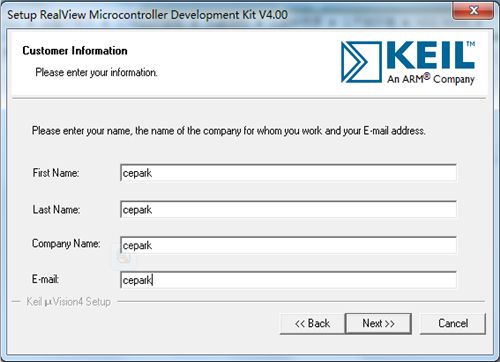
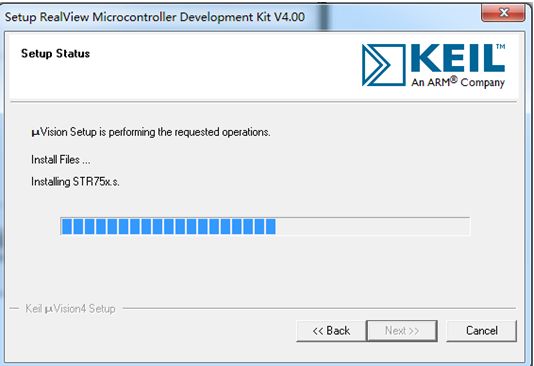
It takes about a few minutes to enter the installation procedure and patiently wait for the automatic installation to complete.
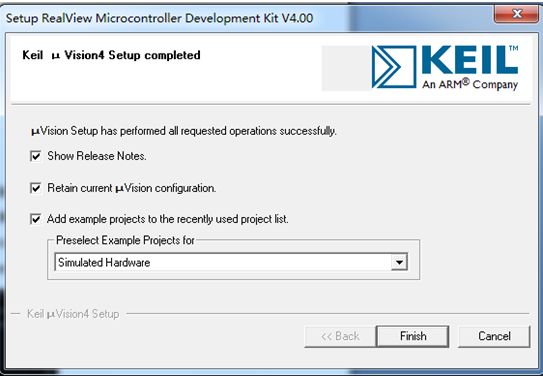
After installation is complete, see three options
1) Display release notes.
2) Keep current uVision settings.
3) Load the following selected project instance, the default is.
Click finish to complete the installation.
Desktop shortcuts are as follows

3. Crack KEIL MDK
The undecoded KEIL MDK will have a 32K program code limit, and the code written will have no effect, but the situation will be different after porting large code such as UC/OS. Each compilation will prompt the code limit and the compiler will not pass: " *****size of this image (41532 bytes) exceeds the maxim*****â€. So you also need to crack the software. Open the registration machine "keil 4.0 registrar.exe" on the CD, the interface is shown in the figure.
First you need to obtain the software's CID number. Open the installed KEIL MDK software,
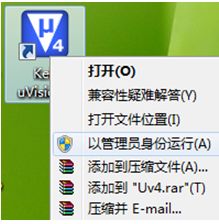
(Note: win7 system runs as administrator, otherwise it cannot be successfully cracked)
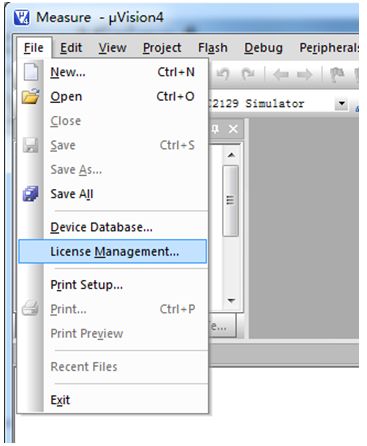
Click file - license management, as shown.
Enter the account management interface, copy the CID number, as shown
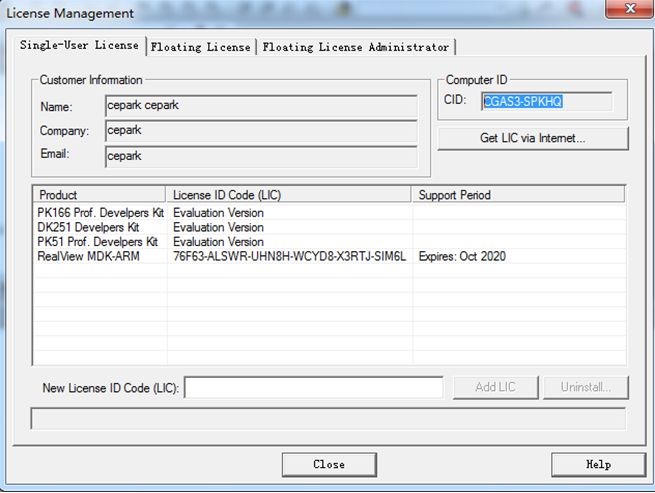
Copy the CID number to the registration machine's CID, as shown in Figure 1. Select "Target" for ARM
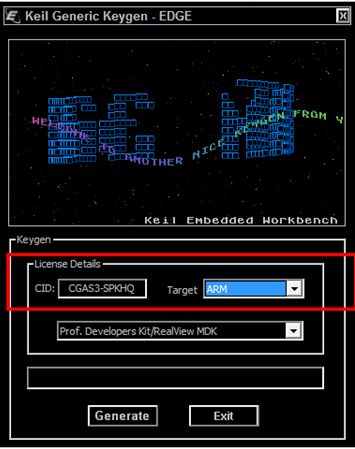
Click on the "Generate" button to generate the LIC code as shown in the figure and copy the LIC code.
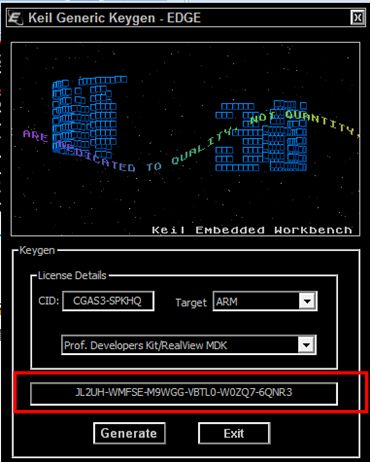
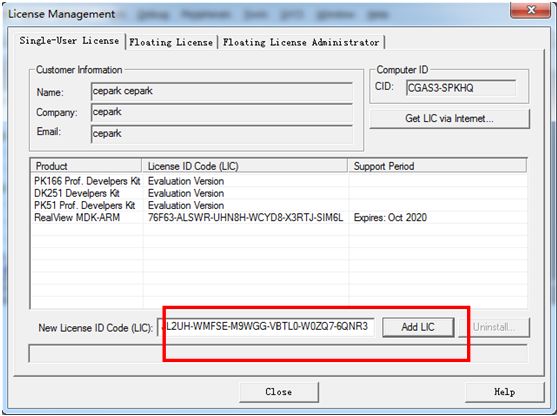
Copy the copied LIC code "JL2UH-WMFSE-M9WGG-VBTL0-W0ZQ7-6QNR3" into the Keil 4 license management management interface as shown in the figure. Click on Add LIC
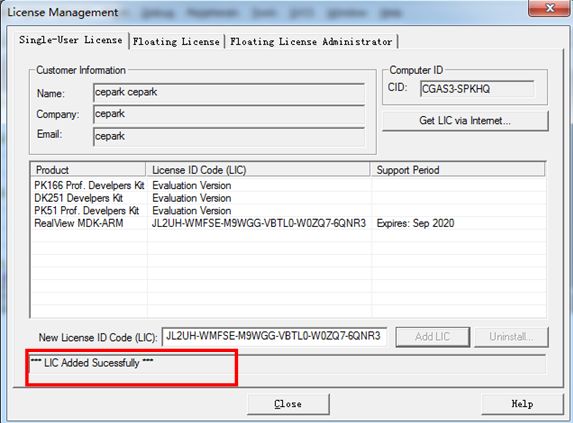
After clicking Add LID, the prompt is added successfully as shown in the figure. Now cracked successfully.
4. Use KEIL MDK download, simulation debugging
Open the interface as shown
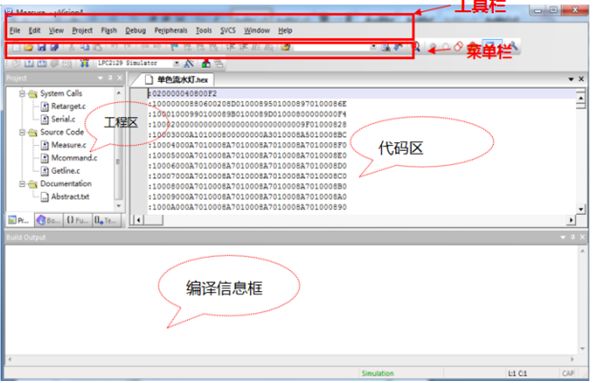
1) JLINK simulation setup process
Click the Project Settings button in the toolbar as shown

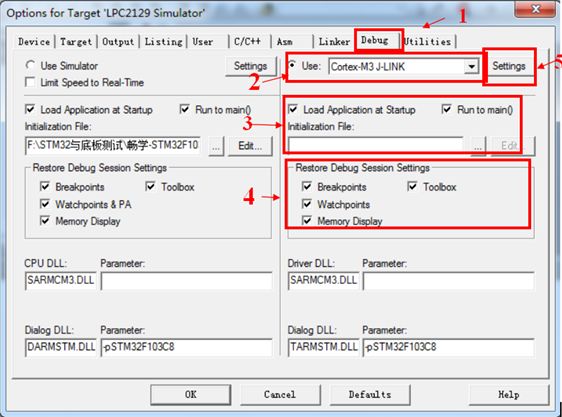
Select the Debug tab as shown in the figure.
1) Select Debug tab
2) Check the use box on the use of thousands of models, select Cotex-M3-JLINK.
3) Check the two items shown in the figure
4) Check the four options shown in the figure.
5) After setting, click settings.
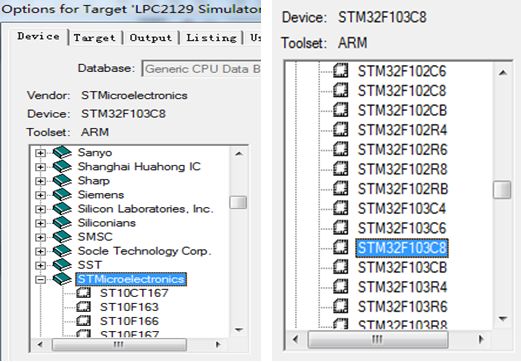
Select the chip model as STM32F103CB
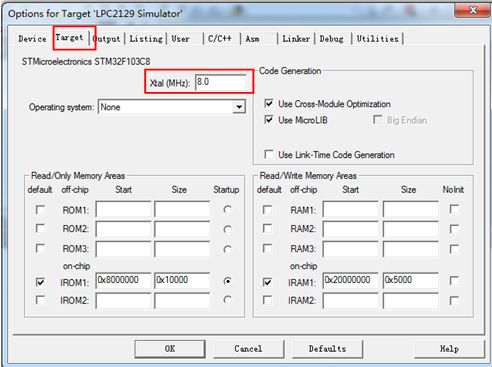
Target- Crystal Select 8MHZ
Click Debug-settings

If the JLINK and the motherboard are connected normally, an information box appears as shown in the figure, and JLINK and the target board are displayed. The left half shows the JLINK connection status. If the JLINK connection is normal, the JLINK version number and other information can be read out normally. If there is an error, the status is gray. The right half is the target board information. If the connection is normal, relevant information is displayed here. For example, the STM32 development board is connected here, and the Device Name is correctly read as an ARM core chip. Download mode We choose SW mode, download speed is selected as 100KHZ. Click OK to exit the setting. Return to the project settings page, click OK to exit the project settings.
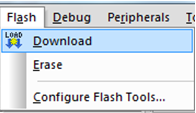
Select Download under the menu Flash or the Load button in the toolbar to download the program directly.
After the download is successful, the download success message is displayed in the compilation information bar as shown in the figure.
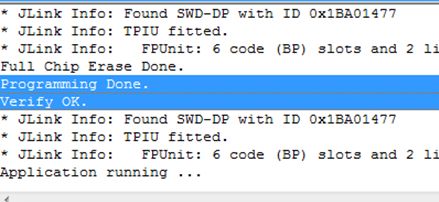
You can also use KEIL MDK to simulate the program and debug online. The program provided on the CD-ROM has been compiled, so the user can go directly to the debugging step. Select Debug's start/stop Debug Session, or the debug button in the toolbar. Go to the simulation page.
2) ULINK2 simulation process
Click the Project Settings button in the toolbar as shown

Select the Debug tab as shown in the figure.
1) Select Debug tab
2) Check the use of thousands of options, model selection ULINK2/ME Cortex Debugger
3) Check the two items shown in the figure
4) Check the four options shown in the figure.
5) After setting, click settings.
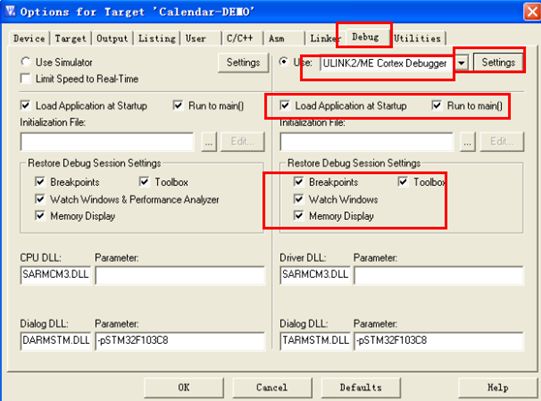
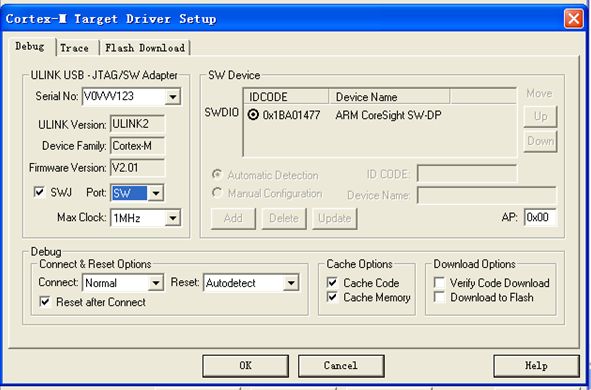
Click on the settings behind, out of the following dialog box, stm32 single-chip select "swj" port selection SW, click ok
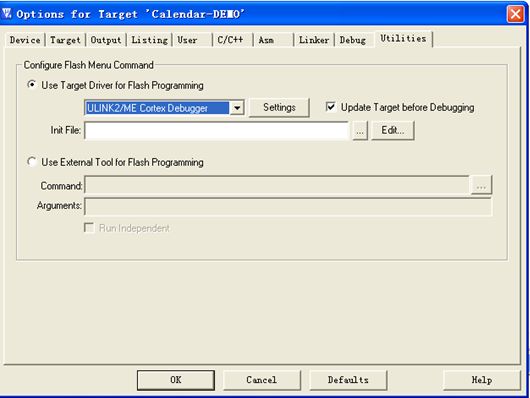
After selecting Utilities, remember to select ULINK2/ME Cortex Debugger here, and click on setting
As shown in the figure below, add the chip type in the add selection chart below, click ok
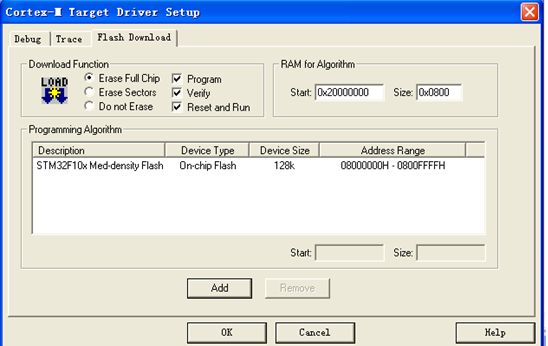
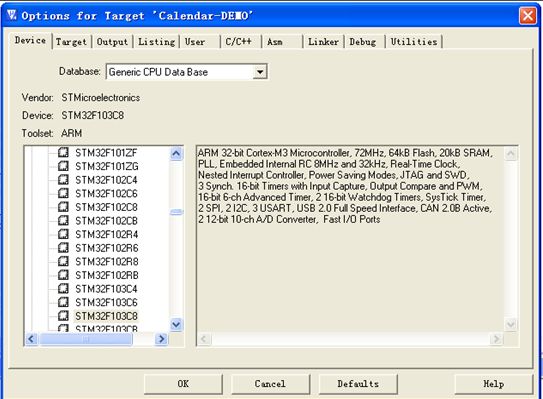
Finally, don't forget to choose the chip
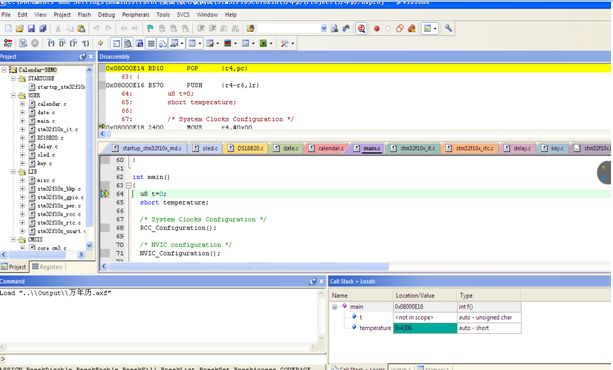
Click debugger, the following page will appear, it means the simulation is successful
ZGAR Vape Device 5.0
ZGAR electronic cigarette uses high-tech R&D, food grade disposable pod device and high-quality raw material. All package designs are Original IP. Our designer team is from Hong Kong. We have very high requirements for product quality, flavors taste and packaging design. The E-liquid is imported, materials are food grade, and assembly plant is medical-grade dust-free workshops.
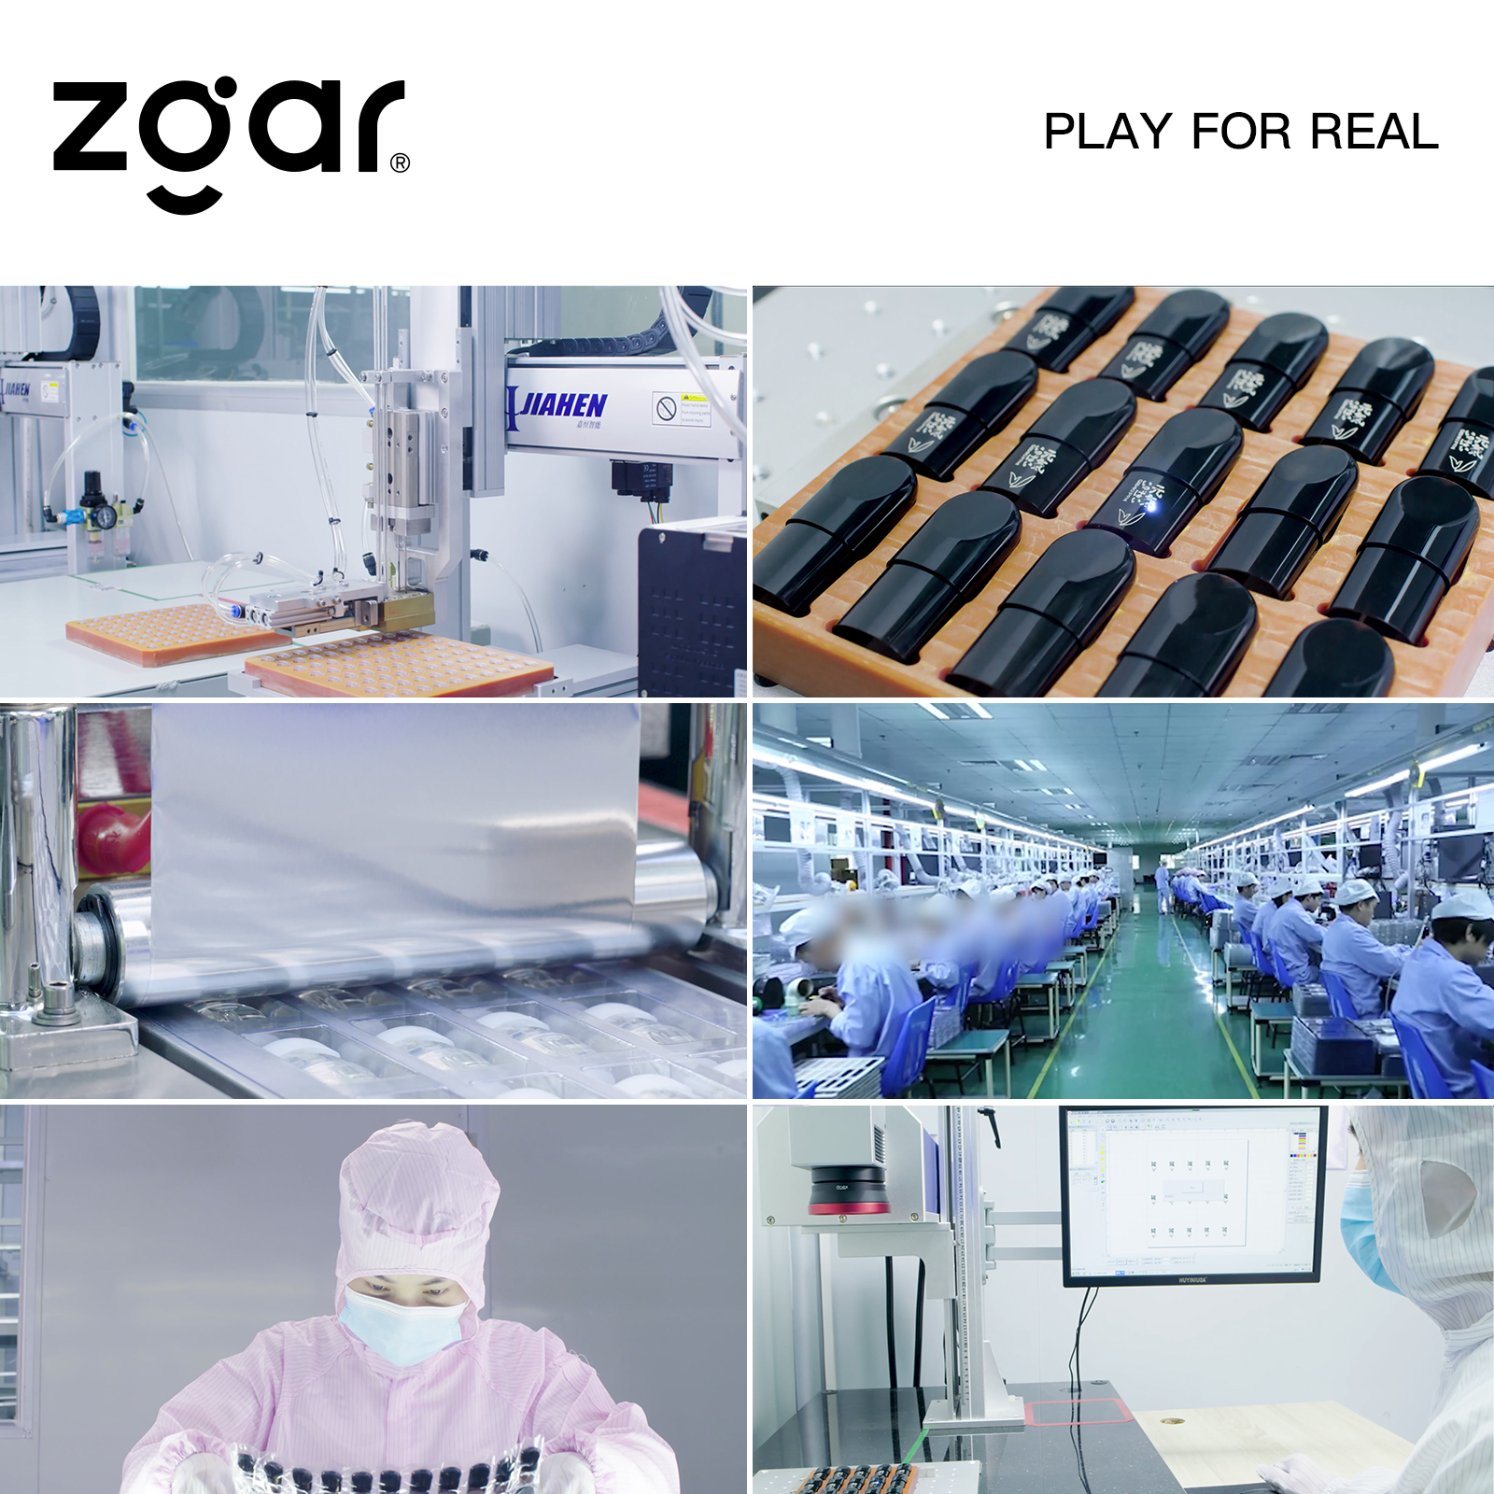
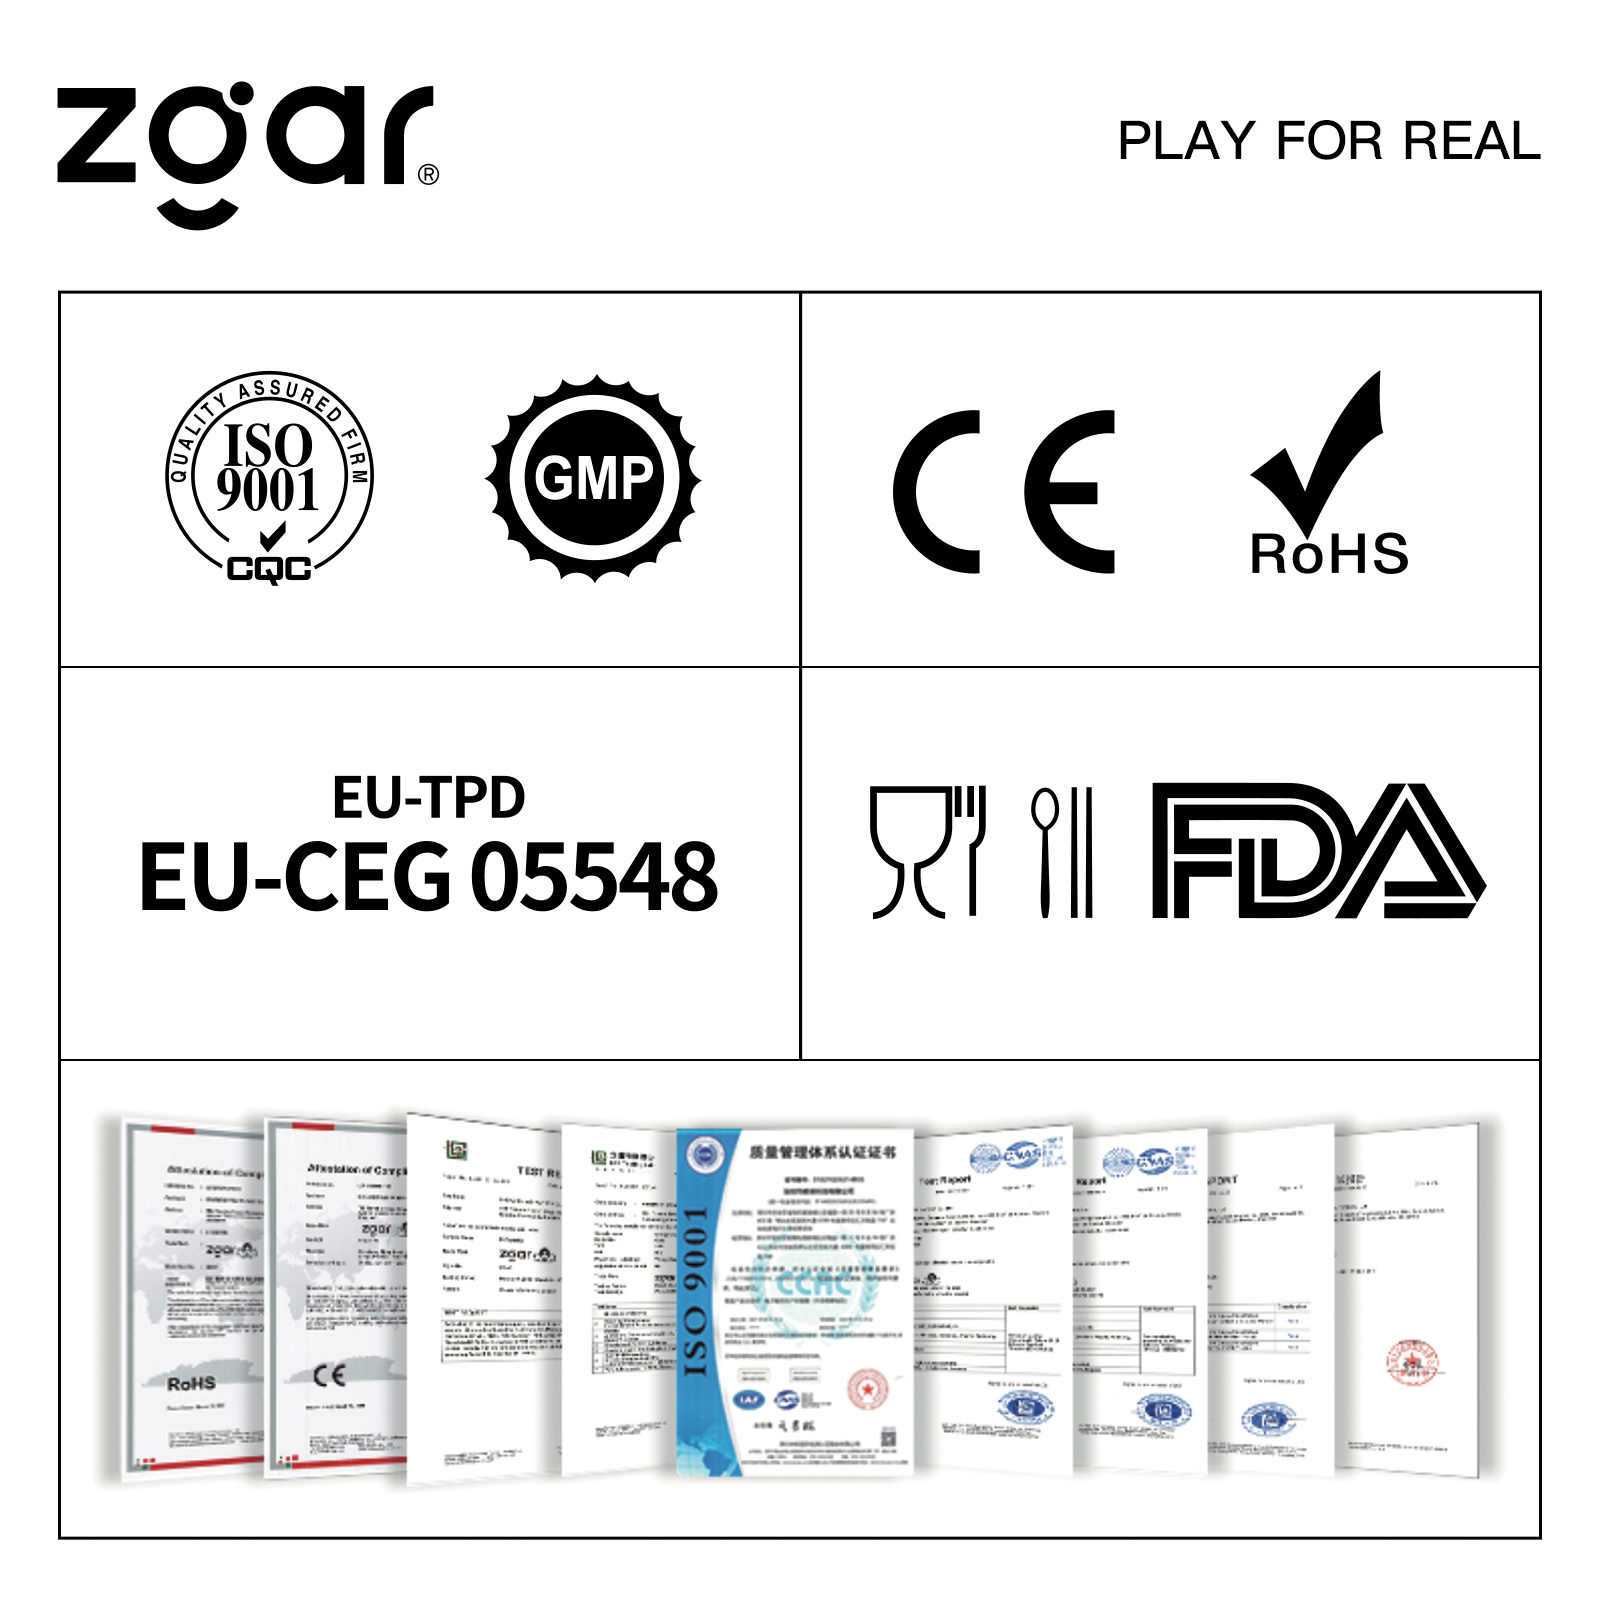
From production to packaging, the whole system of tracking, efficient and orderly process, achieving daily efficient output. We pay attention to the details of each process control. The first class dust-free production workshop has passed the GMP food and drug production standard certification, ensuring quality and safety. We choose the products with a traceability system, which can not only effectively track and trace all kinds of data, but also ensure good product quality.
We offer best price, high quality Vape Device, E-Cigarette Vape Pen, Disposable Device Vape,Vape Pen Atomizer, Electronic cigarette to all over the world.
Much Better Vaping Experience!
ZGAR 5.0 E-Cigarette Vape Pen,ZGAR 5.0 Device Vape,ZGAR Vape Device 5.0 Vape Pen Atomizer,ZGAR Vape Device 5.0 Disposable E-Cigarette OEM vape pen,ZGAR Device 5.0 electronic cigarette
ZGAR INTERNATIONAL(HK)CO., LIMITED , https://www.zgarecigarette.com